When you need this
If your house has a crawl space with open foundation vents, the dirt floor under it needs to be covered with a plastic vapor barrier. Bare earth gives off moisture all day, every day. Without a barrier, that moisture ends up in your floor framing, your insulation, and eventually your house, as musty smells, sagging insulation, mold on the joists, and wood rot.
A missing, torn, or bunched-up vapor barrier is also one of the most common items on a North Carolina home inspection report. If you are getting ready to sell, or you just bought a house and the inspector flagged it, this is usually the fix.
This guide covers a vented crawl space, the kind with open vents in the foundation walls. Sealing up a crawl space completely (often called encapsulation or a closed crawl space) is a different job, covered at the bottom.
What the code actually requires
Under North Carolina's residential code (Section R408.2), a vented crawl space needs a ground vapor retarder that meets three numbers:
| What gets checked | Requirement |
|---|---|
| Coverage | All exposed earth, wall to wall. No bare dirt anywhere. |
| Thickness | 6-mil polyethylene minimum. Never thinner. |
| Seams | Sheets overlap at least 12 inches. |
That's it. The code does not require running the plastic up the foundation walls or wrapping it around the piers in a vented crawl space. You will hear numbers like "3 inches below the top of the wall" or "4 inches up the piers," but those belong to the rules for closed crawl spaces, not vented ones. Laying the barrier flat and staking it down is an accepted method.
Our crew goes a step past the minimum: we tape every seam end to end and stake the edges, the seams, and around every pier so nothing shifts later.
Before you unroll anything
Clean the floor. Pull out old plastic, debris, rocks, roots, and anything sharp. Anything left under the new barrier will eventually punch a hole in it.
Deal with standing water first. If there is water sitting in the crawl space, pump it out and find where it is coming from before any plastic goes down. Plastic over a wet floor just hides the problem.
Check the grade. The dirt should be shaped so water cannot pool on top of the barrier once it is down.
Measure and plan the layout. Measure the footprint and count the piers. Plan your sheets so the seams land in open areas, not right at a pier where they are harder to tape and stake.
Cut sheets outside if you can. Pieces cut on the driveway and carried in go down cleaner and faster than wrestling a full roll in a tight crawl space.
Set up your lights before you crawl in. You will be in there a while.
Step by step
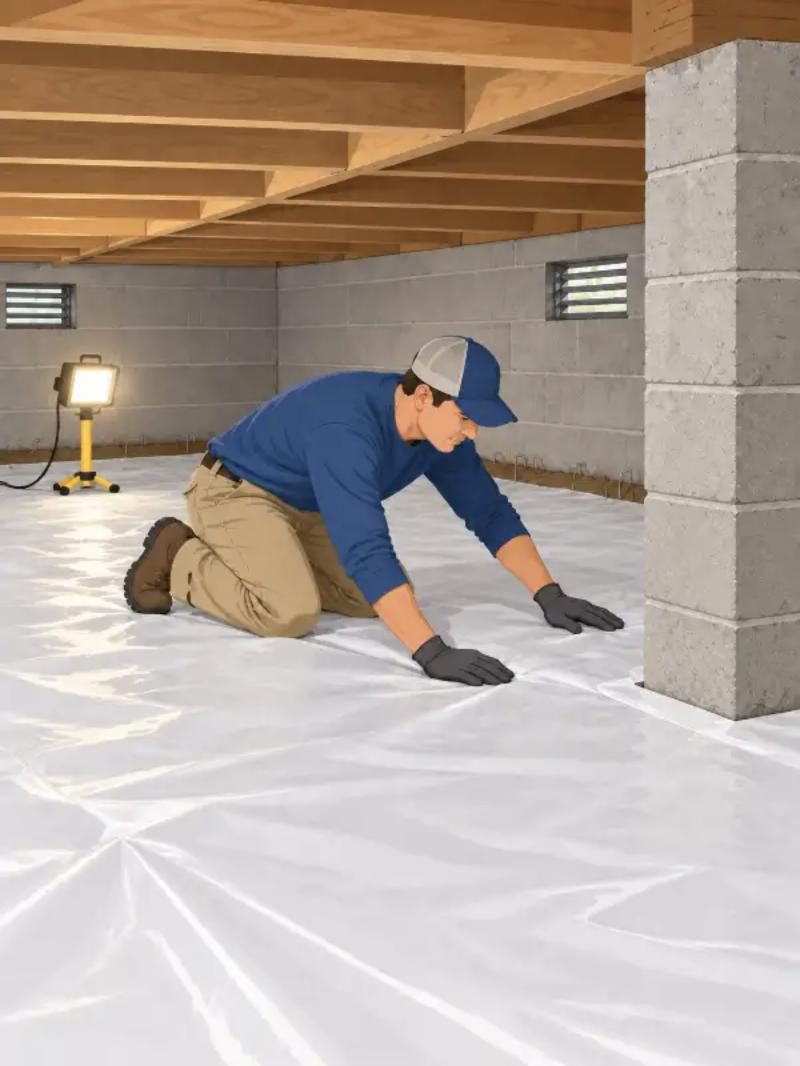
Start at the far corner. Work from the back of the crawl space toward the access door so you never trap yourself behind fresh plastic.
Lay the first sheet flat on the ground. Pull out the wrinkles as you go. Keep it on the ground. Do not run it up the walls or piers.
Stake the outside edges. Drive a landscape staple about every 2 to 3 feet along the perimeter so the edge cannot lift or slide.
Lap the next sheet 12 inches. Lay the next sheet so it overlaps the first by at least a foot. Stake along the overlap, then tape the seam from one end to the other.
Fit around piers and posts at the floor. Cut the plastic to fit tight around the base of each pier or post, right at ground level. Tape the cuts closed and stake around the base. No wrapping up the pier.
Fit around pipes. Cut an X where a pipe comes through, push the plastic down around it, tape the cuts closed, and stake the flap edges.
Keep the vents clear. Never cover a foundation vent with plastic or tape. In a vented crawl space, those vents are how the space dries out.
Walk the whole floor when you finish. Re-stake any edge or seam that lifts.
How to check your work
Before you call it done, go back through and confirm:
- Every bit of dirt is covered.
- Every seam overlaps at least 12 inches and is taped end to end.
- The perimeter and seams are staked, and nothing lifts or slides.
- The plastic fits tight at every pier, post, and pipe, with the cuts taped and staked at the floor.
- Nothing runs up the walls or piers, and nothing covers a vent.
- The plastic lies flat, with no low pockets that could hold water.
Take photos of the finished floor, the seams, and the pier bases. If this was an inspection repair, those photos are what the buyer's agent will ask for.
Common mistakes we see
- Plastic thinner than 6 mil. The cheap painter's plastic from the paint aisle does not meet code and tears the first time someone crawls over it.
- Seams that barely overlap, or aren't taped. A 2-inch overlap with no tape comes apart in a season.
- Loose plastic with nothing holding it down. It slides into a pile against one wall and leaves dirt exposed.
- Covering the vents. In a vented crawl space this traps moisture instead of stopping it.
- Putting plastic over standing water or a wet floor. It hides a drainage problem that will keep getting worse.
- Leaving old, torn plastic underneath. Pull it out. Layering new over old traps debris and makes leaks hard to find.
When to call a pro
Call someone in before you start, or stop and call partway through, if you run into any of these:
- Standing water that keeps coming back. That is a drainage or grading problem, and the vapor barrier will not fix it.
- Mold on the floor joists or subfloor, or soft, rotted wood. The framing needs attention before the barrier goes in.
- Very low clearance. Some crawl spaces are too tight to work in safely.
- You want the crawl space sealed. Closing a crawl space means sealing the vents, insulating the walls, adding a way to dry the air, and pulling a permit. That is a different job with different rules, and a vapor barrier laid this way is not a substitute for it.
If you are buying, selling, or own a rental and want it handled with photos for the file, we do this regularly and can usually fold it in with the rest of an inspection repair list.