When you need this
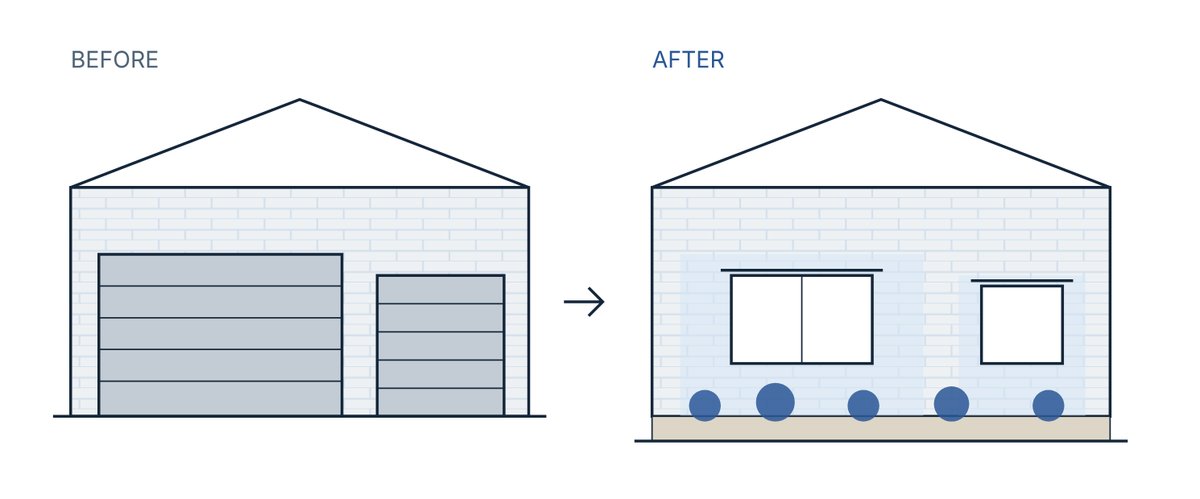
Turning a garage into a bedroom, office, or family room usually means the garage doors go away. On a brick house, the cleanest way to close the opening is to brick it in, set a window or two in the new wall, and finish the brick so nobody can tell there was ever a door there.
Done right, the infill looks like it was always part of the house. Done wrong, it cracks within a few years, leaks at the base, or shows a straight vertical seam where the old door was. Almost every failure comes from three things: what the new brick sits on, how water gets out of the wall, and how the new brick ties into the old.
This is a pro-level job. It involves cutting the slab, pouring a footing, and structural work over the opening, and it needs a permit. Use this guide to understand the work, plan the project, and talk to your contractor and inspector.
Start with the cracks you already have
Before you close the opening, walk the wall and look for cracks. The most common pattern on brick garages is a stair-step crack climbing from the top corners of the door opening toward the gable. That pattern usually points to the steel lintel over the door: the angle iron is rusting, sagging, or doesn't bear far enough onto the brick at each end.
Check the lintel before anything else:
- Scrape the paint at both ends and look for rust scale.
- Run a string line end to end to check for sag.
- Confirm it bears at least 4 to 6 inches onto the brick on each side.
If it's rusted through or sagging, it gets shored and replaced with a properly sized galvanized angle. If it's surface rust only, wire-brush it, treat it with a rust converter, and prime it. New brick will stiffen the wall, but it won't stop a failing lintel from cracking it again.
Do you need a new footing?
Almost always, yes. Brick veneer weighs roughly 40 pounds per square foot of wall, so a typical single-door infill puts 2,000 to 3,000 pounds on whatever it sits on. The edge of a garage slab is usually only 4 to 6 inches thick at the door, with no footing under it. It wasn't designed for that load, and brick set on it will settle and crack.
You can find out what's there in about an hour. Find the joint where the garage slab meets the driveway apron at the door line, saw-cut a 12 x 16 inch test hole just outside the opening, and dig down along the slab edge.
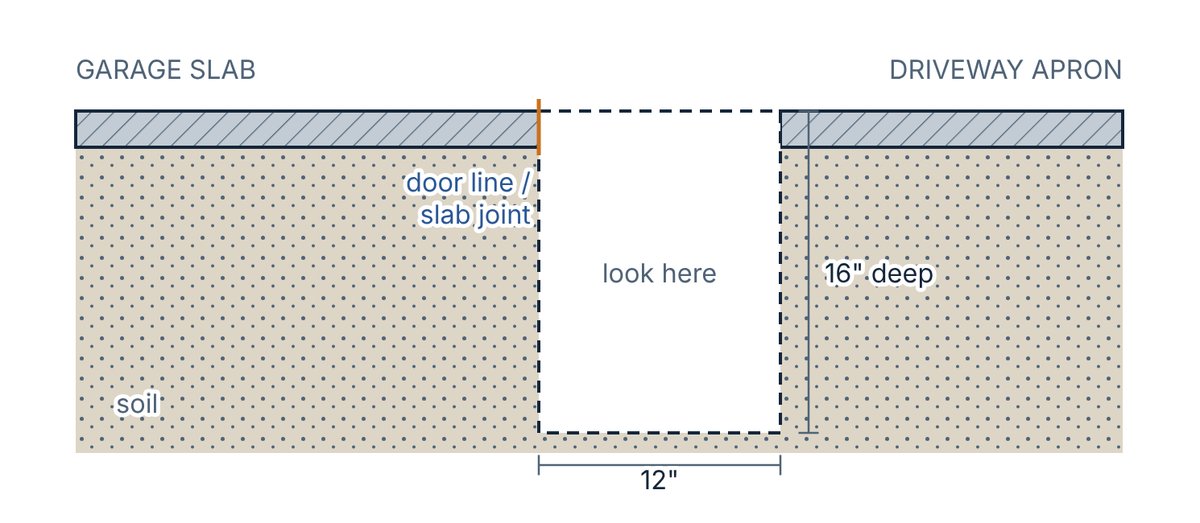
| What you find | What it means | What to do |
|---|---|---|
| 4 to 6 inch slab with soil underneath | Nothing to carry brick | Pour a new footing (the usual case) |
| A thickened slab edge less than 12 inches deep, or no rebar | Not below frost depth or on undisturbed soil | Pour a new footing |
| A continuous footing at least 12 inches wide, 12+ inches below grade, tied into the footings on each side | The original foundation runs through the opening | Bear on it and build a block or brick base up to grade |
The footing and stem
This is the most important drawing in the guide. The new footing carries both the brick on the outside and the framed wall on the inside.
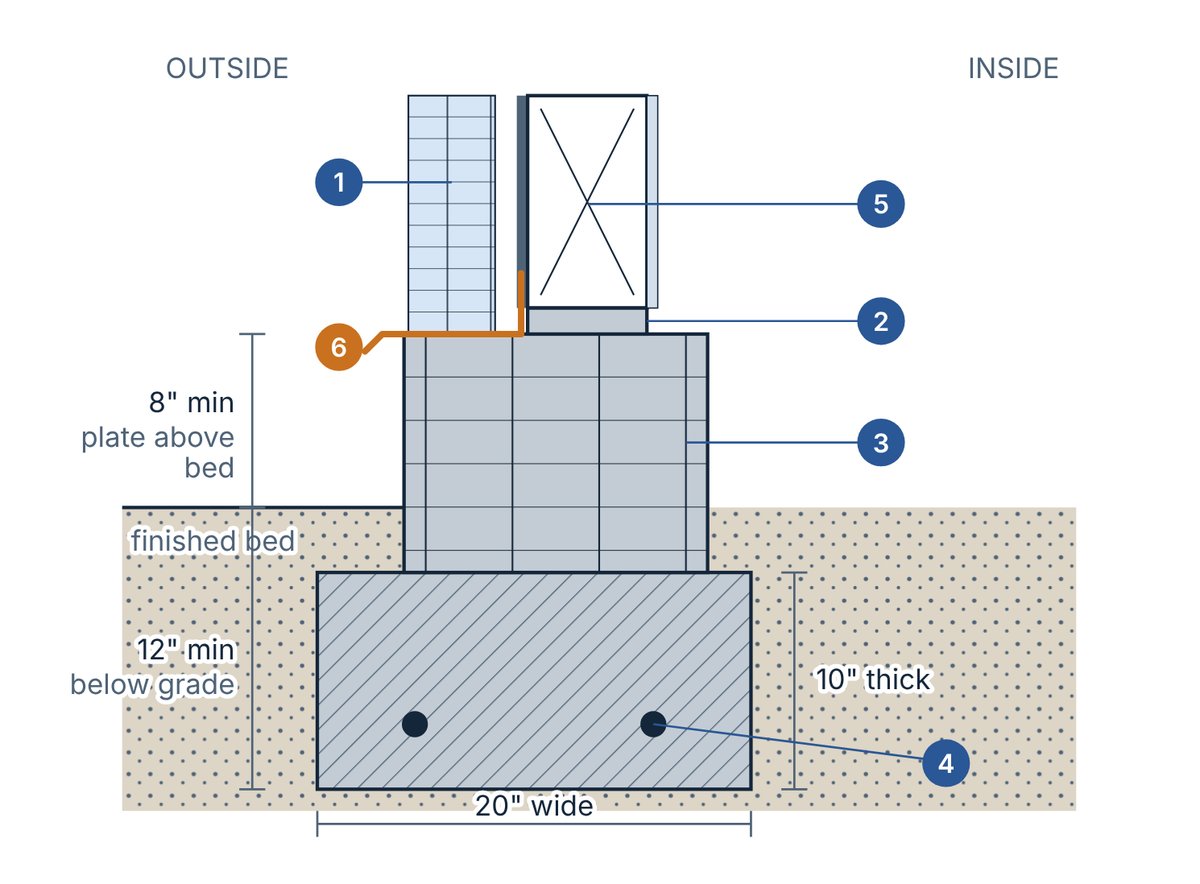
- Brick bears on the outer part of the stem.
- Treated 2x6 bottom plate on sill seal bears on the inner part.
- Block or poured stem brings the wall up to height.
- Footing 20 inches wide by 10 inches thick, with two continuous #4 bars on chairs, on undisturbed soil.
- Studs at 16 inches on center, with sheathing outside and drywall inside.
- Base flashing (orange) runs from behind the house wrap, over the stem, and out past the brick face.
How the crew builds it:
- Saw-cut a strip about 24 inches wide across the opening, from roughly 8 inches inside the stud line to 8 inches past the brick face, and into the foundation at each side.
- Dig to undisturbed soil, at least 12 inches below finished grade (the frost depth in most of North Carolina). Go deeper if you hit fill.
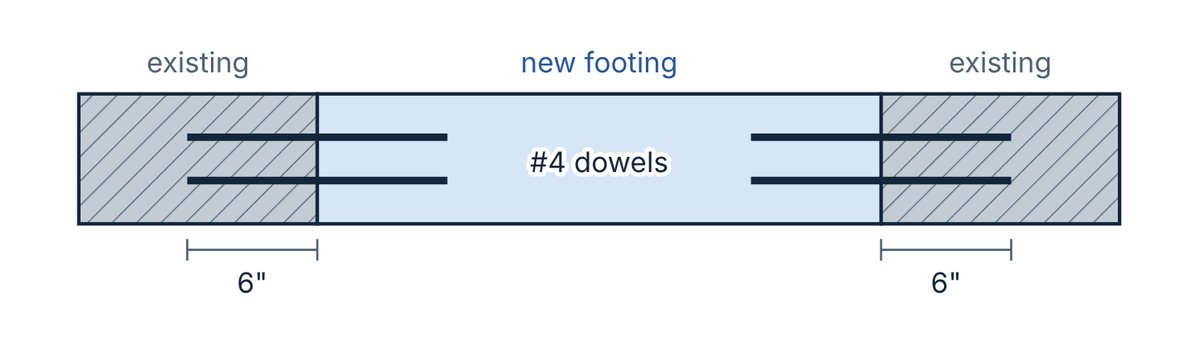
- Drill and epoxy #4 dowels 6 inches into the existing foundation at each side, so the new footing can't settle on its own.
- Build the stem high enough that the wood plate sits at least 8 inches above the finished soil or mulch. If you're adding a flower bed, measure from the top of the finished bed, not today's driveway.
- Get the footing inspected before you pour, and let it cure at least 7 days before laying brick.
The wall: framing, brick, and flashing
The infill is built the same way as the rest of a brick-veneer house: a framed, insulated wall with a brick skin in front of it and a 1-inch air space between them. The air space and the flashing at the bottom are what let water that gets behind the brick drain back out.
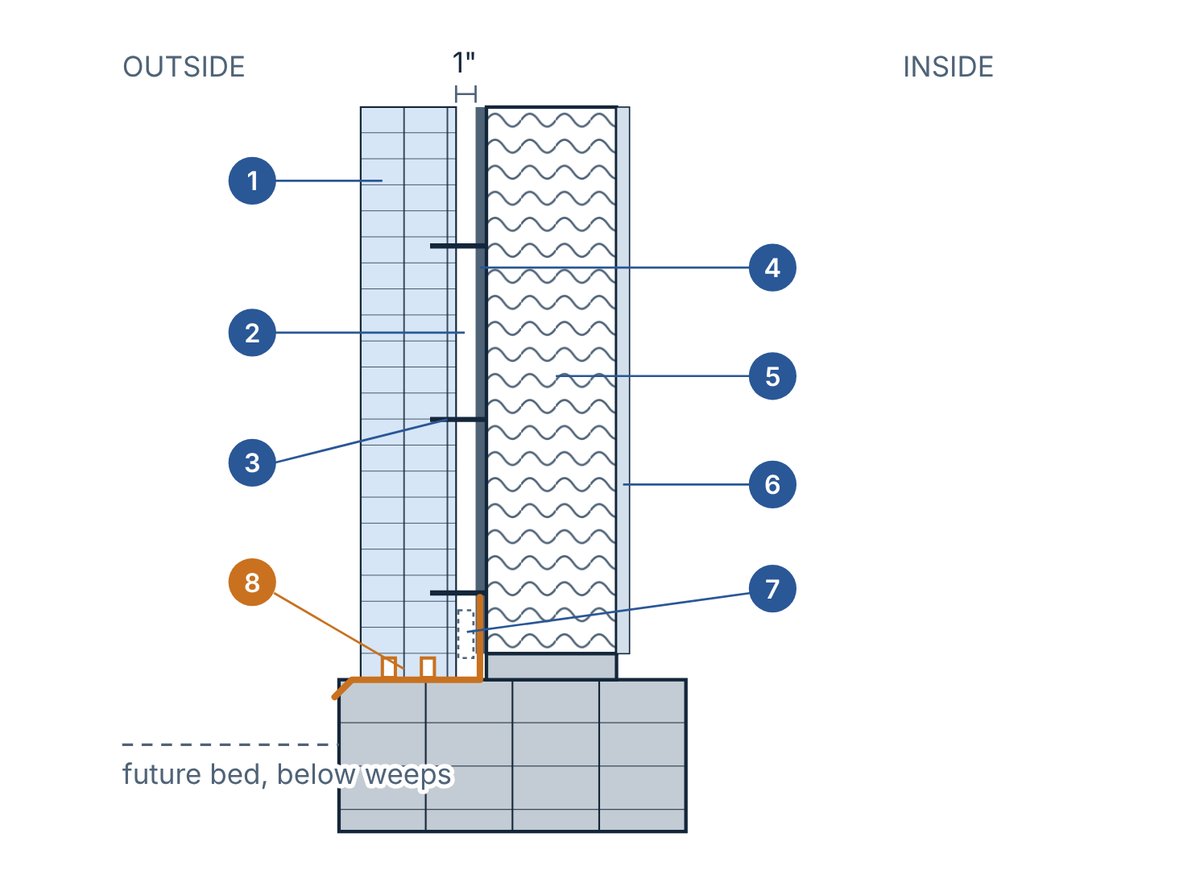
- Brick in Type N mortar, joints tooled to match the house.
- 1-inch air space.
- Corrugated ties every 16 inches vertically and 24 inches horizontally, screwed to the studs.
- House wrap over the sheathing, lapped over the base flashing membrane.
- 2x6 studs at 16 inches, insulated.
- Drywall.
- Mortar net at the base keeps mortar droppings from clogging the weeps.
- Base flashing and weeps (orange). Weeps go every 24 inches in the first course above the flashing. This line must stay above any future flower bed.
Windows in the new wall
Each window needs its own steel lintel above and a sloped brick sill below, and both get flashed.
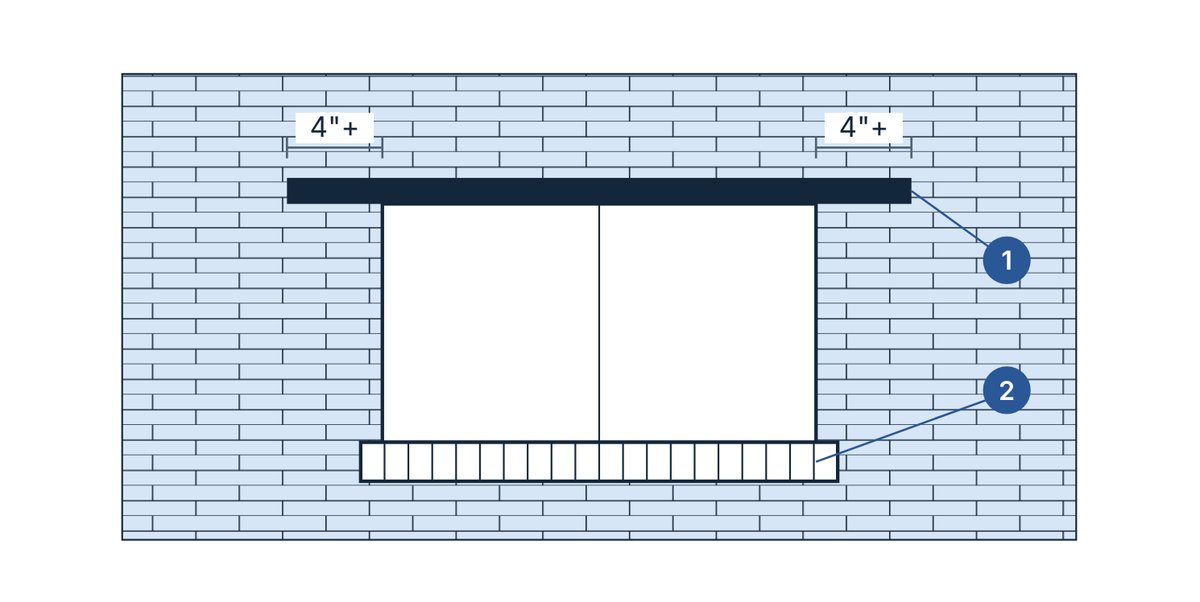
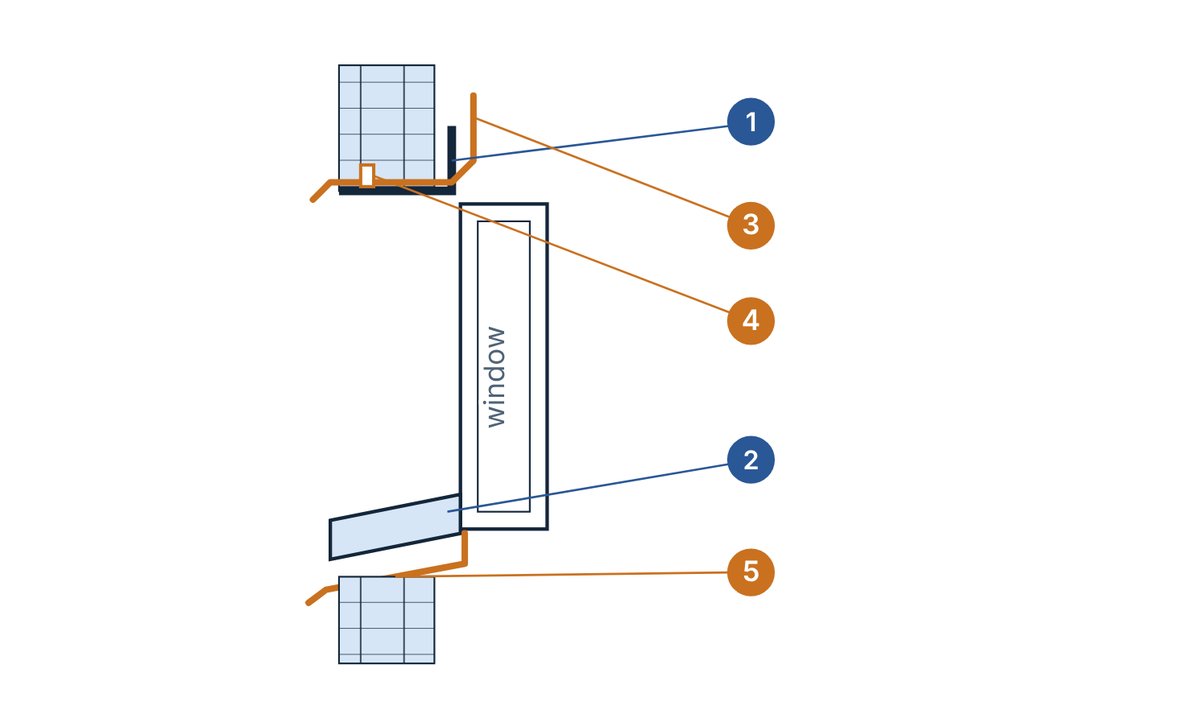
- Galvanized steel angle lintel, bearing at least 4 inches onto the brick on each side.
- Rowlock brick sill (bricks set on edge), sloped out.
- Flashing over the lintel, with end dams turned up at each end so water can't run off the ends into the wall.
- Weeps in the first course above the lintel flashing.
- Flashing under the sill.
Install the windows with sill pans and taped flanges before the brick goes up around them. If the room will be a bedroom, at least one window has to meet egress: roughly 5.7 square feet of net opening, with the sill no higher than 44 inches above the finished floor. If you're raising the garage floor, measure from the new floor.
Tooth the new brick into the old
A straight vertical joint where the old door edge was is the number one giveaway of a patch, even after the wall is stained or painted. The fix is called toothing in: on every other course, cut out the half-brick at the edge of the opening and lay a full new brick across the old edge, so new and old weave together.
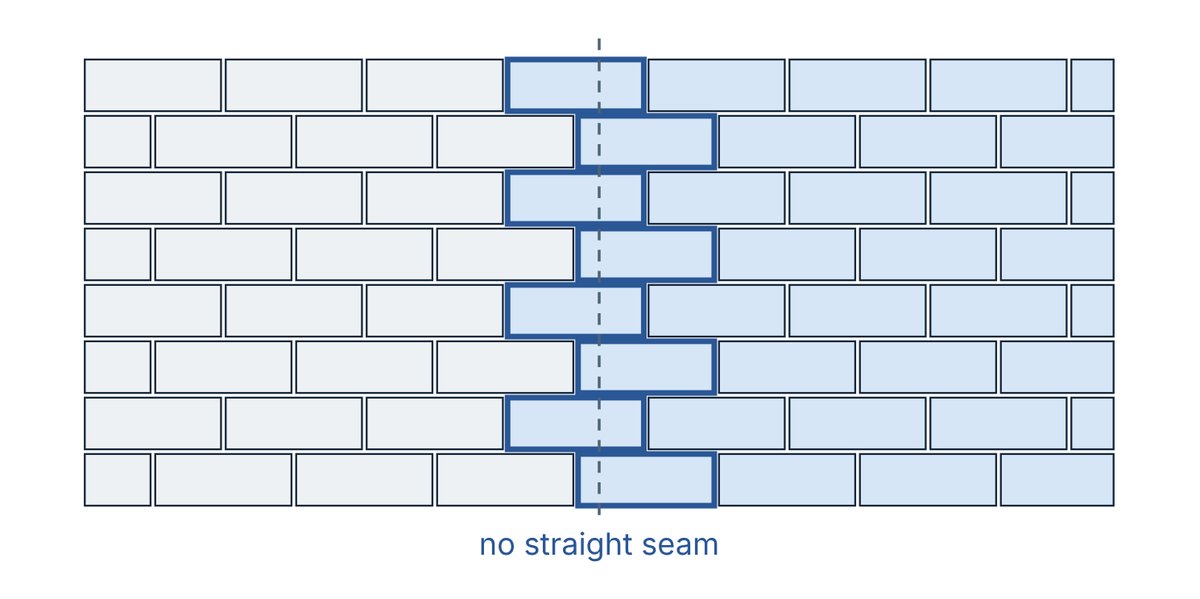
Clean the old mortar off the exposed brick before laying new. Match the existing course lines exactly; even a quarter inch of drift over a few feet shows.
Build sequence
Order matters. The first three steps are what make the job last.
- Permit and window sizes. Pull the permit and confirm any bedroom window meets egress.
- Match the brick. Measure brick length, height, and the height of three courses including joints. Take a photo with a tape measure on it to a brick yard and match the face texture and course height, not just the color. Buy 10 to 15% extra.
- Inspect the lintel over the opening and fix it if needed (see above).
- Remove the doors, tracks, and springs. Before removing any center post between two doors, confirm it isn't carrying a beam.
- Cut, dig, inspect, and pour the footing and stem. Let it cure at least 7 days.
- Frame the wall: treated plate on sill seal, studs, window openings with headers, sheathing, then house wrap lapped over the base flashing membrane.
- Install the windows with sill pans and taped flanges.
- Tooth out the edges of the old opening.
- Install base flashing and weeps.
- Lay the brick, with ties, the air space, matched courses, and mortar net at the base.
- Set window lintels and sills with their flashing.
- Top out with the last course packed tight under the existing lintel, no gap.
- Seal the inside where the new framing meets the old wall and slab.
Repair the old cracks last
Repair the existing cracks after the lintel is fixed and the infill is laid, so you aren't patching movement that is still happening.
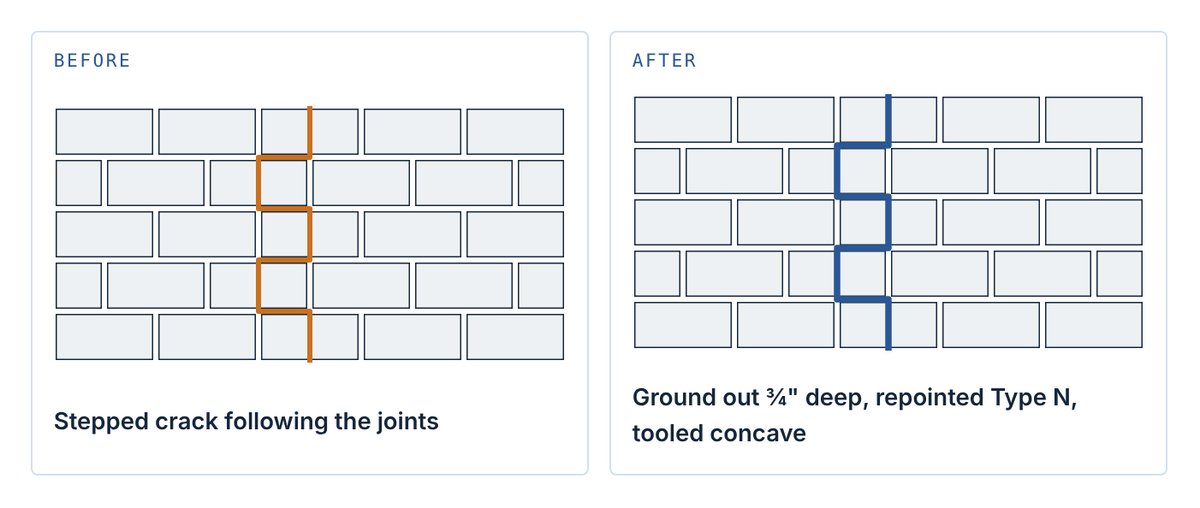
- Cracked joints: grind the mortar out 3/4 inch deep along the whole crack, repoint with Type N mortar, and tool the joint to match.
- Cracked bricks: cut them out and replace them with matched brick. Don't fill a crack through a brick with caulk; it shows through any finish.
- Above the old door: cracks here often close up once the lintel is fixed and the infill takes some load. Do these last.
- Gable cracks: repoint. If they reopen within a year, cut in a vertical control joint at the crack with sealant colored to match.
- Lintel ends: leave a small sealant joint where steel meets brick, so the angle can expand without cracking the corner again.
Make the patch disappear
The finish is what sells the job. Painted and stained brick both work, but the whole wall gets finished together, never just the new section.
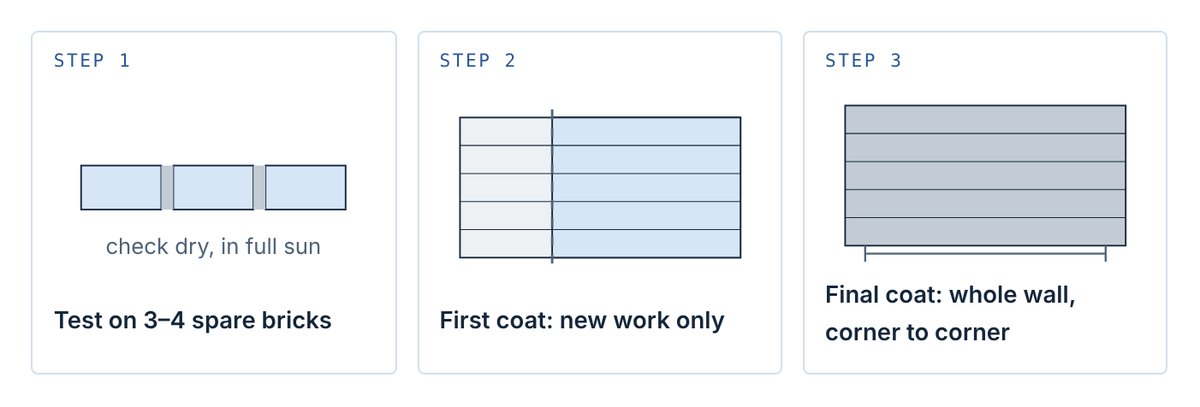
- Identify the existing finish. Find out the brand and color if you can. Mineral (silicate) stains, acrylic stains, and paints don't always bond over each other.
- Test first. Finish 3 or 4 spare bricks with a mortar joint between them and look at them dry, in full sun. Stain and paint both dry a different shade than they look wet.
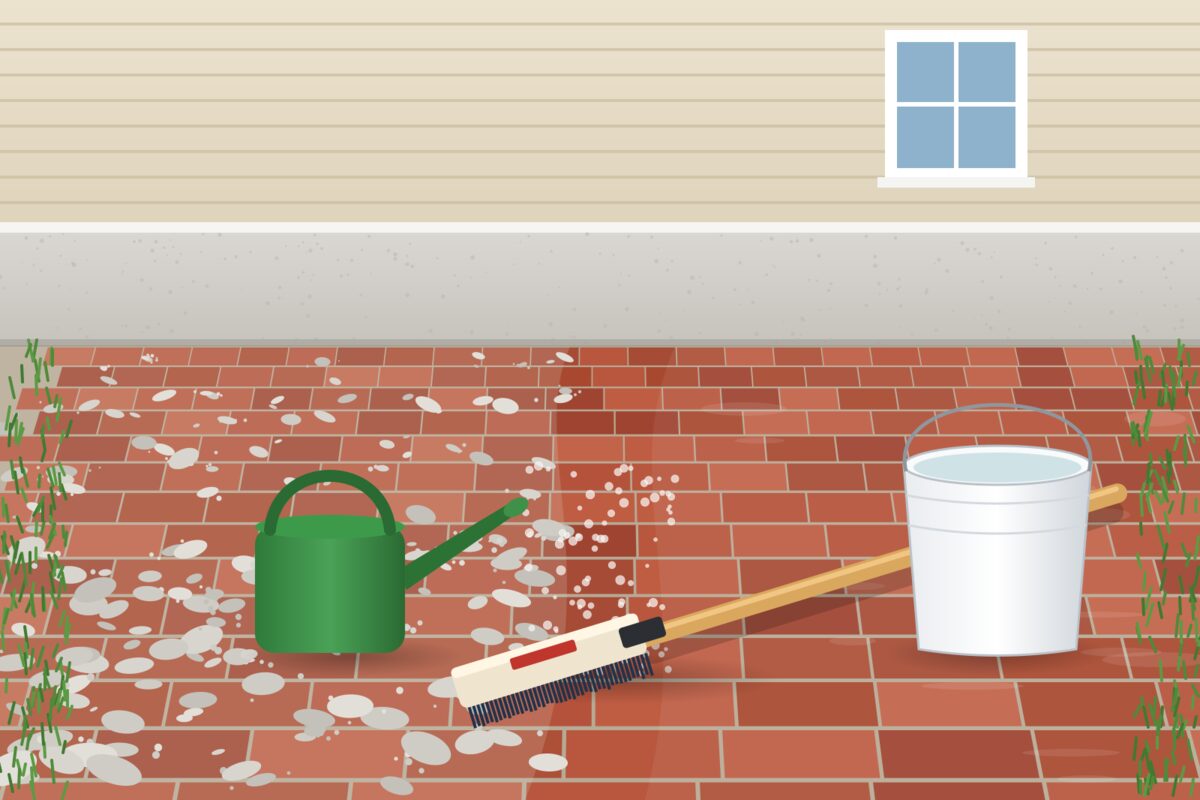
- Let the mortar cure 28 days, then clean the new brick and repointed joints with masonry cleaner, rinse, and let it dry 2 to 3 days.
- First coat on the new work only: the infill brick, new mortar, and repointed joints. New brick absorbs differently than old brick, and this evens it out.
- Final coat on the entire wall, corner to corner. Brush into the joints so the mortar takes the color too. Spot-finishing leaves an edge you'll see every time low sun hits the wall.
- Paint the steel lintels with an exterior metal paint matched to the wall color.
Finish the base with a flower bed
A bed along the old door line hides the base course and softens the wall. It also brings soil up against the house, so it has to be built to keep water and termites away from the framing.
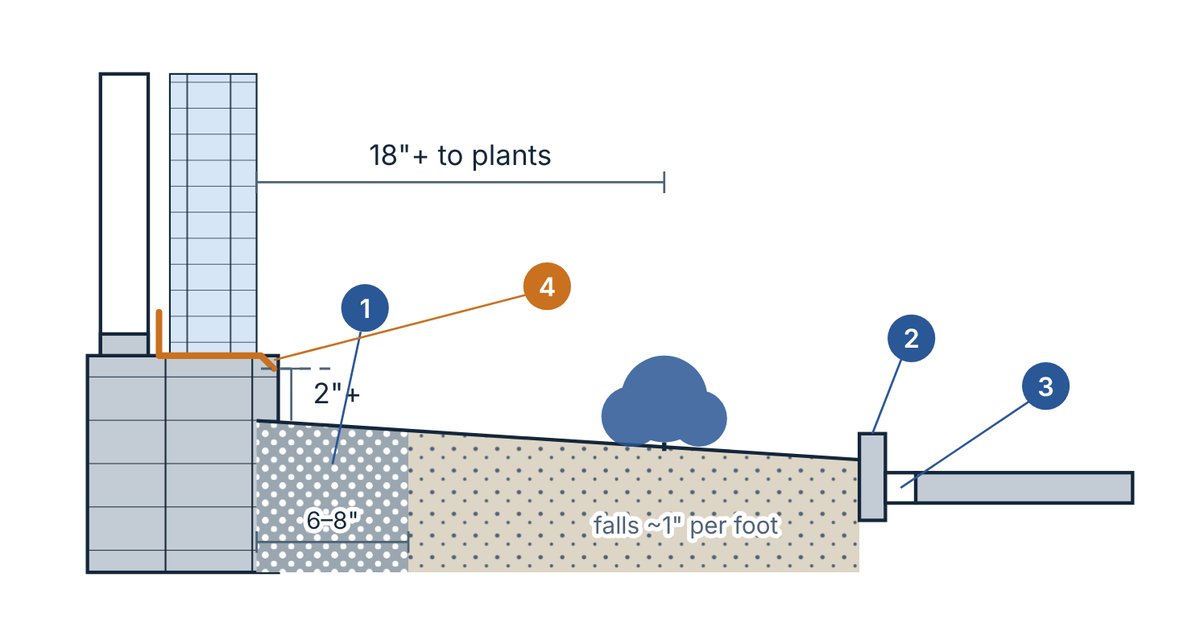
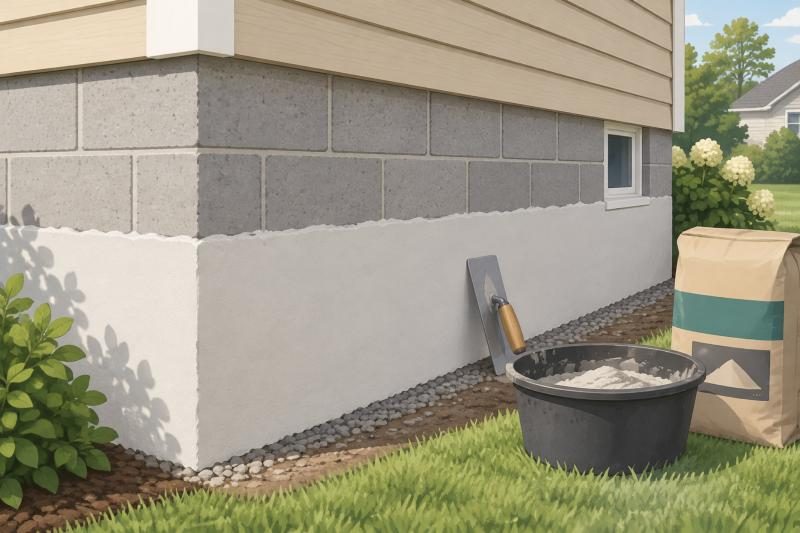
- Gravel strip 6 to 8 inches wide right against the brick keeps soil and mulch off it.
- Edging: a low brick or stone border, finished to match the house.
- Channel drain where the bed meets the driveway, so driveway runoff doesn't pond in the bed.
- Weep line: the bed surface stays at least 2 inches below the weeps and slopes away from the wall about 1 inch per foot.
Saw-cut the driveway apron 30 to 36 inches out from the wall and remove the concrete to make room. Set shrubs at least 18 inches off the wall so air moves and the brick stays reachable, and keep irrigation from spraying the wall. If the house has a termite contract, tell your pest company before you dig along the foundation.
Common mistakes we see
- Setting brick on the slab edge. It looks fine for a year or two, then settles and cracks.
- No flashing or weeps at the base. Water that gets behind the brick has nowhere to go but into the framing.
- A straight seam at the old door edge. Without toothing in, the outline of the door shows forever.
- Ignoring the lintel. Cracks above the old door keep coming back until the steel is fixed.
- Finishing only the new brick. Even a perfect color match ages differently. Finish the whole wall.
- Burying the weeps under a new flower bed or mulch.
When to call a pro
This is a job for a licensed contractor with masonry and framing experience, working under a permit. Call one if:
- You see cracks wider than 1/4 inch, cracks that have shifted, or cracks that are growing.
- The lintel over the opening is rusted through or sagging.
- The test hole shows no footing (the usual case).
- The conversion includes a bedroom, bathroom, or new heating and cooling, which bring their own code requirements.
If you're planning a conversion, request an estimate. We look at it the way our real estate partners would: a converted garage only adds value if it looks like it was always part of the house.